
How to Enable Approval for SIT and EIT while submitting the transaction using Self Service HRMS.
Goal: How to Enable Approval for SIT and EIT while submitting the transaction using Self Service HRMS.
Bydefault when you submit a transaction using ‘Extra Information’ (EIT) or ‘Special Information’ (SIT) function from self service it does not go for Approval. Using workflow builder you have to modify the workflow process (HR_EIT_JSP_PRC for EIT and HR_SIT_JSP_PRC for SIT) to enable the approval process. This document provides step-by-step information, showing how to enable approval for these two processes.
Any time you apply a patch (if the patch updates the seeded HRSSA workflow, the patch will overwirte the changes that enable approval), you have to redo these steps or you can duplicate HR_EIT_JSP_PRC and HR_SIT_JSP_PRC and give a new name so that the patch will not overwrite the changes. If you use the duplicate the process then please make sure the call these duplicated process from the SSHR function call too.
Example: If you apply a new HRMS Family pack patch the seeded workflow process will be overwritten.
You will need workflow builder to make these changes. If you have not installed workflow builder already installed then please follow Note: 261028.1 Title: 11i – 12 How To Download and Install the Latest Oracle Workflow Builder (Client Tool) and XML Gateway Message Designer for E-Business Suite , to install the workflow builder in your local machine.
Seeded Menu and function parameter details that is called from ‘Employee Self-Service’ responisbility for SIT and EIT.
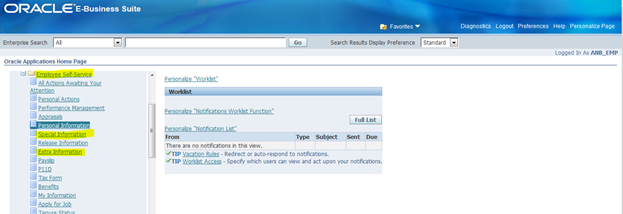
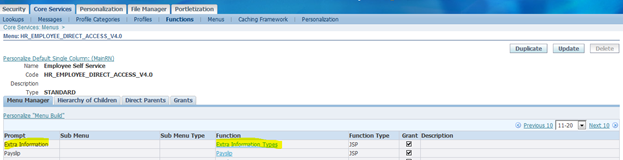
Navigate to ‘Functional Administrator’ responsibility -> Core Services -> Menu
Query Name: Employee Self Service (this is the menu used with seeded ‘Employee Self-Service’ responsibility)
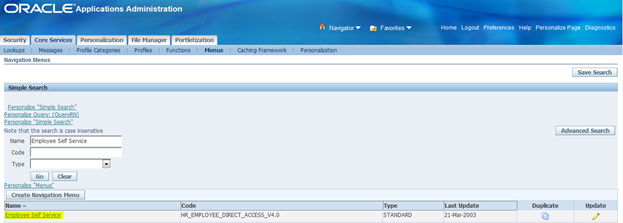
Click on the ‘Employee Self Service’ link
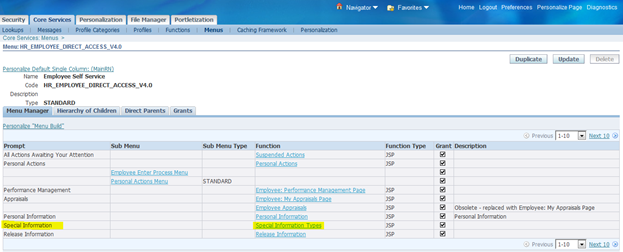
Click on ‘Special Information Types’ function name – this is to check the parameters used for this function call.
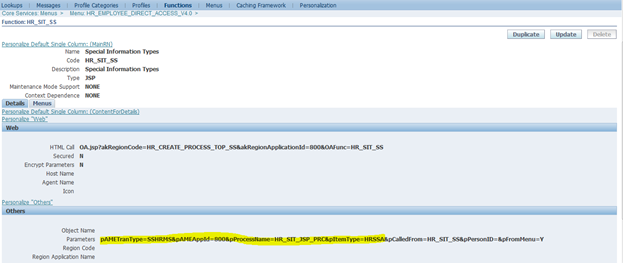
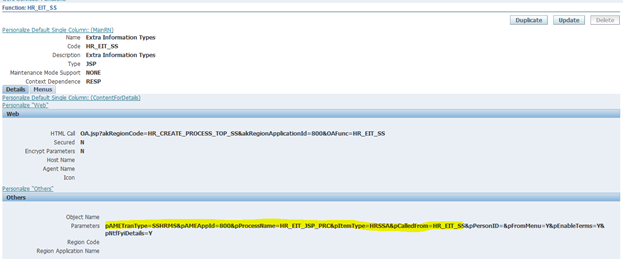
The above screen shot shows the parametes used for the function call.
pAMETranType=SSHRMS indicates the AME transaction type used for the function.
pProcessName=HR_SIT_JSP_PRC&pItemType=HRSSA shows the workflow process name and item type is HRSSA.
Similarly check the parameters used for EIT.
Click on the Function name
Step1: Download HRSSA workflow from the database.
You can connect to database from the workflow builder (File Open -> Select Database Radio button then enter details to connect) and download the HRSSA workflow or you can use the command from the Unix/Linux command line below to download the file:
WFLOAD apps 0 Y DOWNLOAD /usr/tmp/HRSSA_14Mar2014.wft HRSSA
The above example will download HRSSA to /usr/tmp/HRSSA_14Mar2014.wft file. This can be any file name of your choice. In the above example (DDMonYYYY) is used in the file name to identify when the file was downloaded.
Step2: Open the downloaded .wft file using workflow builder.
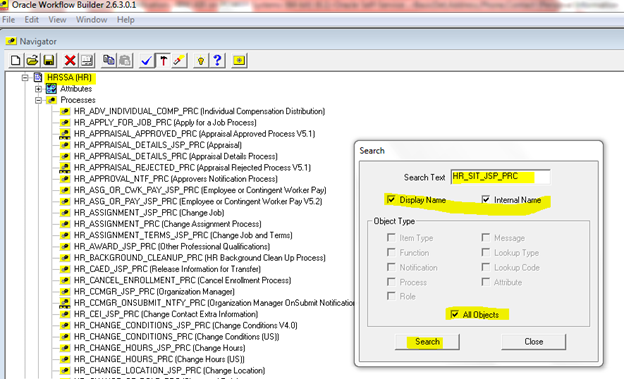
Step3: Search for HR_SIT_JSP_PRC (in case of Special Information or SIT) or HR_EIT_JSP_PRC (in case of Extra Information or EIT)
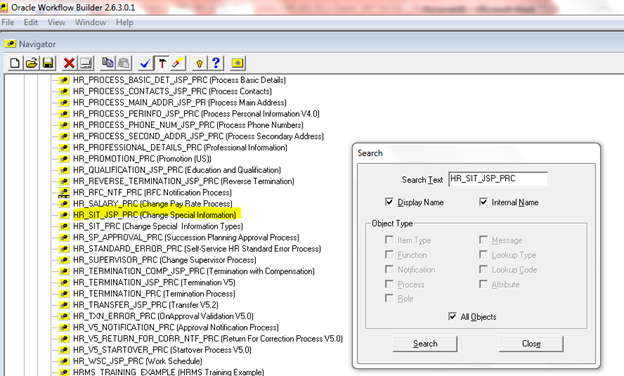
Step4: Double click on the HR_SIT_JSP_PRC process or HR_EIT_JSP_PRC process depending on the function.
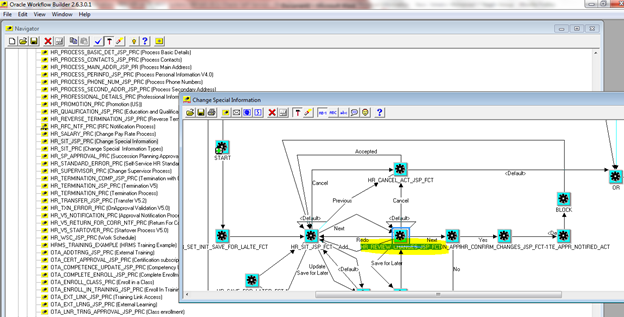
Step5: Double click on the HR_REVIEW_CHANGES_JSP_FCT
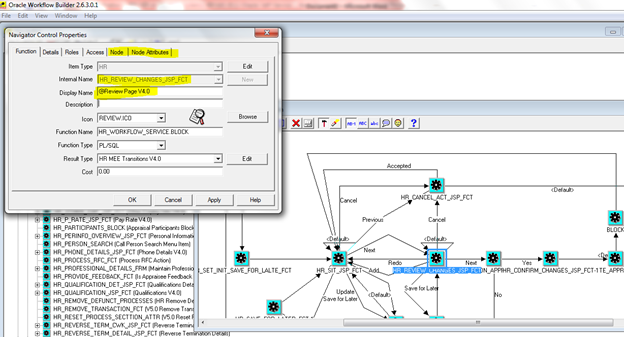
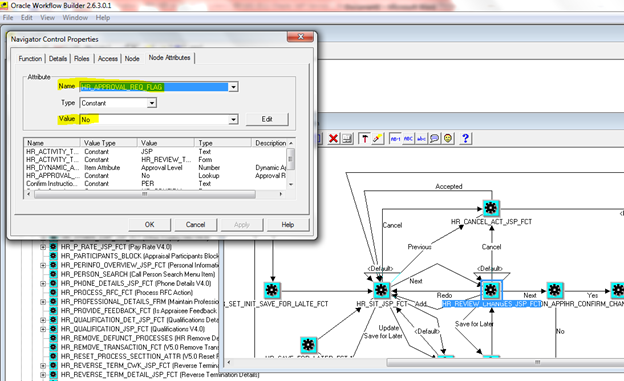
Step6: Click on the ‘Node Attributes’ Tab.
Select HR_APPROVAL_REQ_FLAG from the LOV.
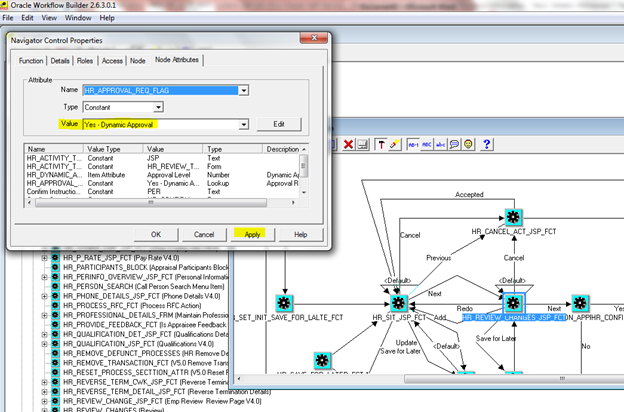
Step7: Change the Value from No to ‘Yes – Dynamic Approval’ (if you are using AME for Approval), click Apply button. Next click OK button.
Step8: Save the Changes to the database.
Note: You can also use following command from the command line to upload a .wft file
Example:
After modifying the HRSSA using workflow builder, click File -> Save As
Give a new name (d:\HSSA_24Sep2014_modified.wft), Save. (Again this can be any name of your choice).
ftp the file the Unix/Linux (Let’s say you ftp the file to /usr/tmp/HSSA_24Sep2014_modified.wft) . Please make sure to ftp the file in binary mode.
WFLOAD apps 0 Y UPLOAD /usr/tmp/HSSA_24Sep2014_modified.wft
This above command will upload the HRSSA workflow to the database.
Step9: Bounce the Apache. Now this will show approvers in the review page (you can also add Adhoc Approvers in the review page after this if you are using AME for Approval setup).
IMPORTANT: Always make sure to take back of workflow before making any changes and test in non-production instance before deploying in production instance.